

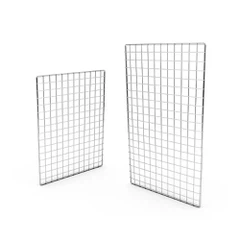
How to attach a hang rail for clothes to a wall?
Aug 04, 2025
Leave a message
Hey there! If you're looking to organize your closet or a clothing display area, attaching a hang rail for clothes to a wall is a great solution. As a hang rail for clothes supplier, I've got plenty of experience with this, and I'm here to walk you through the whole process.
What You'll Need
First off, let's talk about the tools and materials you'll need. You're gonna need a measuring tape to make sure everything's in the right place. A drill is essential for making holes in the wall. You'll also need some screws and wall plugs. These are gonna keep your hang rail firmly attached to the wall. And of course, you'll need the hang rail itself. We offer a variety of hang rails that are not only sturdy but also look great. Check out our Steel Wire Baskets and Perforated Metal Shelving options for some cool storage ideas that can go along with your hang rail.
Step 1: Measure and Mark
The first step is to measure where you want to install the hang rail. Decide how high you want it to be. Usually, for a standard closet, a height of about 60 to 66 inches from the floor is a good choice. This gives you enough space to hang most clothes without them touching the ground. Use your measuring tape to mark the spots on the wall where the brackets of the hang rail will go. Make sure the marks are level. You can use a spirit level to double - check. If you're installing a long hang rail, it's a good idea to mark multiple points along the length to ensure it's straight.
Step 2: Drill the Holes
Once you've marked the spots, it's time to drill the holes. Put on some safety goggles to protect your eyes from any debris. Set your drill to the appropriate size for the wall plugs you're using. Usually, a drill bit that's slightly smaller than the wall plug is a good choice. Start drilling slowly at the marked points. Apply gentle pressure and let the drill do the work. Don't force it too hard, or you might damage the wall. If you hit something hard, like a stud in the wall, that's actually a good thing. You can use screws directly into the stud for extra support. But if you're not drilling into a stud, insert the wall plugs into the holes once you've drilled them.
Step 3: Attach the Brackets
Now it's time to attach the brackets to the wall. Take your hang rail brackets and line them up with the holes in the wall. Insert the screws through the holes in the brackets and into the wall plugs or studs. Use a screwdriver or a drill with a screwdriver bit to tighten the screws. Make sure they're nice and tight, but don't overtighten them, or you might strip the threads. Check again to make sure the brackets are level. If they're not, you can loosen the screws a bit and adjust them.
Step 4: Install the Hang Rail
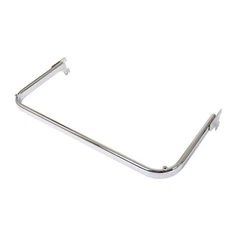
Once the brackets are securely attached to the wall, it's time to install the hang rail. Carefully place the hang rail onto the brackets. Some hang rails have a simple slide - on mechanism, while others might require you to use additional screws or clips to secure them. Follow the instructions that came with your hang rail to make sure it's installed correctly. If you're using a long hang rail and it's made up of multiple sections, make sure to connect the sections properly. You might need to use connectors or joiners that come with the rail.
Step 5: Check and Adjust
After you've installed the hang rail, give it a little shake to make sure it's stable. If it wobbles at all, check the screws and brackets to see if they need to be tightened. You can also check the level of the hang rail one more time. If it's slightly off, you can make small adjustments by loosening the screws and moving the brackets a bit.
Tips and Tricks
- If you're installing the hang rail in a rented property, you might want to use adhesive - backed brackets instead of drilling holes in the wall. Just make sure the adhesive is strong enough to hold the weight of the hang rail and the clothes.
- Consider the weight capacity of your hang rail. If you're planning to hang heavy coats or lots of clothes, make sure you choose a sturdy hang rail with a high weight capacity.
- For a more stylish look, you can paint the hang rail to match the color of your closet or room. Just make sure to use a paint that's suitable for the material of the rail.
Why Choose Our Hang Rails
As a hang rail for clothes supplier, we take pride in offering high - quality products. Our hang rails are made from durable materials that can withstand the test of time. We have a wide range of styles and finishes to choose from, so you can find the perfect hang rail to match your needs and decor. Whether you're looking for a simple and functional hang rail for your home closet or a more elaborate one for a commercial clothing display, we've got you covered. And don't forget to check out our Waterfall Faceout option for a unique and eye - catching display idea.


Get in Touch
If you're interested in purchasing our hang rails or have any questions about the installation process, we'd love to hear from you. We can provide you with more information about our products, including pricing and delivery options. Just reach out to us, and our friendly team will be happy to assist you. Whether you're a homeowner looking to organize your closet or a business owner in need of a clothing display solution, we've got the hang rail for you. So don't hesitate to contact us and start transforming your space today!
References
- Home Improvement Guides: General knowledge on home installation projects.
- Manufacturer's Instructions: Provided with the hang rail and related products.
Send Inquiry