How to attach hooks to a cloth hanger rack?
Jul 30, 2025
Leave a message
Attaching hooks to a cloth hanger rack is a practical and useful skill that can significantly enhance the functionality of your clothing storage or display solution. As a leading cloth hanger rack supplier, we understand the importance of customization and maximizing the utility of our products. In this blog post, we'll guide you through the process of attaching hooks to a cloth hanger rack, providing you with step-by-step instructions and valuable tips.
Why Attach Hooks to a Cloth Hanger Rack?
Before we dive into the how-to, let's briefly discuss why you might want to add hooks to your cloth hanger rack. Hooks offer several benefits:
- Increased Hanging Space: Hooks allow you to hang additional items such as belts, scarves, hats, or small bags that may not fit on traditional hangers. This effectively multiplies the available hanging space on your rack.
- Organization: By using hooks, you can keep related items together and easily accessible. For example, you can hang all your ties on one hook or group your handbags on another, making it easier to find what you need.
- Display: Hooks can be used to showcase items in a more visually appealing way. For instance, you can hang a few statement scarves or a collection of hats to add a decorative touch to your closet or retail display.
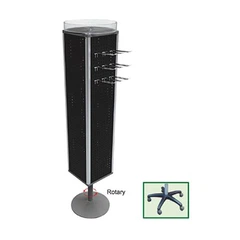
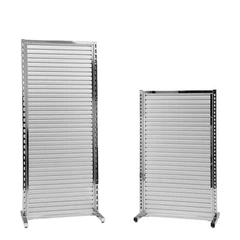
Types of Cloth Hanger Racks
There are various types of cloth hanger racks available in the market, each with its own characteristics and suitability for hook attachment. Here are some common types:
- Movable Hanging Clothes Rack: These racks are typically lightweight and come with wheels, making them easy to move around. They are ideal for small spaces or for those who need to rearrange their clothing storage frequently.
- Adjustable Clothes Rail On Wheels: As the name suggests, these racks have adjustable rails, allowing you to customize the height and spacing according to your needs. They are suitable for both residential and commercial use.
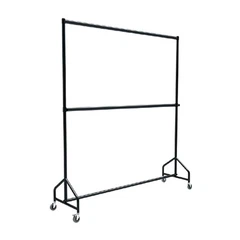
- Retail Garment Display Rack: Designed specifically for retail stores, these racks are often more sturdy and feature a variety of display options. They are perfect for showcasing clothing in an attractive and organized manner.
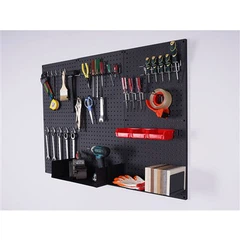
Tools and Materials You'll Need
To attach hooks to your cloth hanger rack, you'll need the following tools and materials:
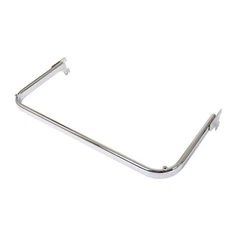
- Hooks: There are different types of hooks available, such as S-hooks, J-hooks, and wall-mounted hooks. Choose the type that best suits your needs and the design of your rack.
- Measuring Tape: This will help you determine the correct spacing and placement of the hooks.
- Pencil or Marker: Use this to mark the spots where you'll be attaching the hooks.
- Drill (if necessary): If your rack is made of wood or metal and requires drilling, you'll need a drill and appropriate drill bits.
- Screwdriver: You'll need a screwdriver to tighten the screws or bolts when attaching the hooks.
- Wall Anchors (if attaching to a wall): If you're attaching the rack to a wall, you'll need wall anchors to ensure a secure installation.
Step-by-Step Guide to Attaching Hooks to a Cloth Hanger Rack
Now that you have all the necessary tools and materials, let's get started with the process of attaching hooks to your cloth hanger rack:
Step 1: Plan the Placement
- Determine the Purpose: First, decide what you'll be hanging on the hooks and how many hooks you'll need. This will help you determine the spacing and placement of the hooks.
- Measure and Mark: Use a measuring tape to measure the distance between the hooks and mark the spots on the rack with a pencil or marker. Make sure the marks are evenly spaced and at the desired height.
Step 2: Prepare the Hooks
- Choose the Right Hooks: Select the hooks that are appropriate for your rack and the items you'll be hanging. For example, if you're hanging heavy items, choose hooks that are strong and durable.
- Inspect the Hooks: Before attaching the hooks, inspect them for any damage or defects. Make sure the hooks are in good condition and can support the weight of the items you'll be hanging.
Step 3: Attach the Hooks
- For Racks with Pre-Drilled Holes: If your rack has pre-drilled holes, simply insert the hooks into the holes and tighten the screws or bolts with a screwdriver. Make sure the hooks are securely attached and do not wobble.
- For Racks without Pre-Drilled Holes: If your rack does not have pre-drilled holes, you'll need to drill holes at the marked spots. Use a drill and appropriate drill bits to drill the holes. Make sure the holes are the right size for the hooks. Once the holes are drilled, insert the hooks and tighten the screws or bolts.
- For Wall-Mounted Racks: If you're attaching the rack to a wall, you'll need to use wall anchors. First, mark the spots on the wall where you'll be attaching the rack. Then, drill holes in the wall and insert the wall anchors. Next, attach the rack to the wall using screws or bolts. Finally, attach the hooks to the rack as described above.
Step 4: Test the Hooks
- Hang a Light Item: Once the hooks are attached, hang a light item on one of the hooks to test its stability. Make sure the hook can support the weight of the item without falling off or bending.
- Check the Spacing: Check the spacing between the hooks to ensure that there is enough room to hang the items you want. If necessary, adjust the spacing by moving the hooks to a different location.
Tips and Tricks
- Use a Level: When marking the spots for the hooks, use a level to ensure that the hooks are straight and evenly spaced. This will give your rack a more professional and organized look.
- Consider the Weight Capacity: Make sure the hooks you choose can support the weight of the items you'll be hanging. If you're hanging heavy items, such as coats or jackets, choose hooks that are strong and durable.
- Mix and Match Hooks: Don't be afraid to mix and match different types of hooks to create a more diverse and functional hanging system. For example, you can use S-hooks to hang belts and J-hooks to hang scarves.
- Label the Hooks: If you're using the hooks to organize your clothing, consider labeling the hooks to make it easier to find what you need. You can use sticky labels or a label maker to label the hooks.
Conclusion
Attaching hooks to a cloth hanger rack is a simple and effective way to increase the functionality and organization of your clothing storage or display solution. By following the steps outlined in this blog post and using the tips and tricks provided, you can easily attach hooks to your rack and create a customized hanging system that meets your needs.
As a cloth hanger rack supplier, we offer a wide range of high-quality racks and hooks to suit your needs. Whether you're looking for a movable hanging clothes rack, an adjustable clothes rail on wheels, or a retail garment display rack, we have the perfect solution for you.
If you're interested in purchasing our products or have any questions about attaching hooks to a cloth hanger rack, please feel free to contact us. We'll be happy to assist you with your purchase and provide you with any additional information you may need.


References
- Home Improvement Guides: Various DIY websites and home improvement blogs that provide information on rack customization and hook installation.
- Manufacturer's Instructions: The instruction manuals provided by the cloth hanger rack manufacturers, which often include details on accessory attachment.
Send Inquiry