


How to install a cloth hanger rack on a glass wall?
Aug 15, 2025
Leave a message
Installing a cloth hanger rack on a glass wall can be a practical and stylish solution for organizing your clothes. As a trusted cloth hanger rack supplier, we understand the importance of a proper installation process to ensure the stability and functionality of the rack. In this blog post, we'll guide you through the steps of installing a cloth hanger rack on a glass wall, providing you with all the necessary information to complete the task successfully.
Tools and Materials You'll Need
Before you start the installation process, gather the following tools and materials:
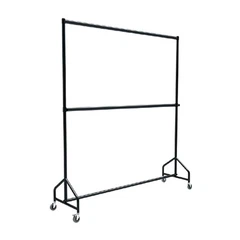
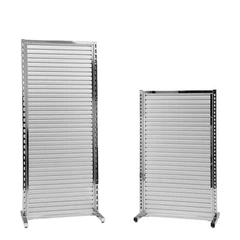
- Cloth hanger rack: Choose a rack that suits your needs and the size of your glass wall. We offer a variety of options, including Collapsible Rolling Racks for Clothes, Retail Garment Display Rack, and Movable Hanging Clothes Rack.
- Measuring tape: To ensure accurate placement of the rack.
- Pencil: For marking the installation points on the glass wall.
- Drill: A drill with a glass drill bit is required for making holes in the glass.
- Wall anchors: Suitable for glass walls to provide secure support for the rack.
- Screwdriver: To attach the rack to the wall anchors.
- Safety glasses and gloves: To protect yourself during the installation process.
Step 1: Choose the Right Location
The first step is to determine the ideal location for your cloth hanger rack on the glass wall. Consider the following factors:
- Accessibility: Choose a location that is easily accessible and convenient for hanging and retrieving your clothes.
- Weight capacity: Ensure that the glass wall can support the weight of the rack and the clothes you'll be hanging on it.
- Aesthetics: Select a location that complements the overall design of your room.
Use a measuring tape to mark the desired height and width of the rack on the glass wall. Make sure the markings are level and straight.
Step 2: Prepare the Glass Wall
Before drilling holes in the glass wall, it's important to prepare the surface to prevent cracking or damage. Follow these steps:
- Clean the glass: Use a glass cleaner to remove any dirt, dust, or debris from the surface of the glass. This will ensure a clean and smooth drilling surface.
- Apply masking tape: Place a piece of masking tape over the marked installation points on the glass wall. The tape will help prevent the drill bit from slipping and reduce the risk of cracking the glass.
Step 3: Drill Holes in the Glass Wall
Now it's time to drill holes in the glass wall for the wall anchors. Follow these guidelines:
- Use the right drill bit: Select a drill bit specifically designed for drilling glass. These drill bits are usually made of carbide or diamond and have a special tip to prevent the glass from cracking.
- Start with a small hole: Begin by drilling a small pilot hole at each marked installation point. This will help guide the larger drill bit and prevent the glass from cracking.
- Use a slow speed and light pressure: When drilling the holes, use a slow speed and apply light pressure to avoid cracking the glass. Let the drill bit do the work and avoid forcing it through the glass.
- Keep the drill bit cool: To prevent the drill bit from overheating, periodically dip it in water or use a lubricant designed for glass drilling.
Once you've drilled the pilot holes, increase the size of the holes to match the diameter of the wall anchors.
Step 4: Insert Wall Anchors
After drilling the holes in the glass wall, insert the wall anchors into the holes. Make sure the anchors are firmly seated and flush with the surface of the glass.
Step 5: Attach the Cloth Hanger Rack
Now it's time to attach the cloth hanger rack to the wall anchors. Follow these steps:
- Align the rack with the holes: Place the rack against the glass wall and align the mounting holes on the rack with the wall anchors.
- Insert screws: Insert the screws through the mounting holes on the rack and into the wall anchors. Use a screwdriver to tighten the screws securely.
- Check the alignment: Once the rack is attached, check the alignment to ensure it is level and straight. Make any necessary adjustments by loosening the screws and repositioning the rack.
Step 6: Test the Rack
After installing the cloth hanger rack, it's important to test its stability and functionality. Hang a few lightweight items on the rack and gently shake it to ensure it is securely attached to the glass wall. If the rack feels loose or unstable, tighten the screws or recheck the installation.


Tips for a Successful Installation
- Read the instructions: Before starting the installation process, carefully read the instructions provided with the cloth hanger rack. This will ensure that you follow the correct installation steps and avoid any mistakes.
- Practice on a scrap piece of glass: If you're new to drilling glass, it's a good idea to practice on a scrap piece of glass first. This will help you get familiar with the drilling process and reduce the risk of damaging the actual glass wall.
- Seek professional help: If you're unsure about any aspect of the installation process or if you're dealing with a large or heavy rack, it's recommended to seek professional help. A professional installer will have the experience and tools necessary to ensure a safe and secure installation.
Conclusion
Installing a cloth hanger rack on a glass wall can be a rewarding project that adds functionality and style to your space. By following the steps outlined in this blog post and using the right tools and materials, you can successfully install a cloth hanger rack on your glass wall.
If you're interested in purchasing a high-quality cloth hanger rack, we invite you to explore our wide range of products, including Collapsible Rolling Racks for Clothes, Retail Garment Display Rack, and Movable Hanging Clothes Rack. Our racks are designed to meet the needs of different customers and offer excellent durability and functionality.
If you have any questions or need further assistance with the installation process or product selection, please feel free to contact us. We're here to help you make the right choice and ensure a successful installation.
References
- Home Depot. (n.d.). How to Drill Holes in Glass. Retrieved from [Website URL]
- Lowe's. (n.d.). Installing a Wall-Mounted Rack. Retrieved from [Website URL]
Send Inquiry