

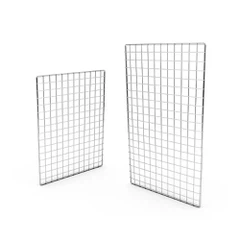
How to install a mesh panel on a deck?
Sep 29, 2025
Leave a message
Installing a mesh panel on a deck can significantly enhance both the functionality and aesthetics of your outdoor space. As a trusted mesh panel supplier, I've had the privilege of assisting numerous customers in transforming their decks with high - quality mesh panels. In this blog, I'll guide you through the step - by - step process of installing a mesh panel on your deck, ensuring a seamless and long - lasting installation.
Step 1: Planning and Preparation
Before you start the installation process, it's crucial to plan and prepare thoroughly. First, measure your deck accurately. Determine the area where you want to install the mesh panel. Consider the size and shape of the panel you need. We offer a wide range of mesh panels, including Steel Wire Panels, which come in various dimensions to suit different deck sizes and styles.
Next, check the local building codes and regulations. Some areas may have specific requirements regarding the height, spacing, and type of mesh panels that can be installed on decks. Make sure your installation complies with all the necessary codes to avoid any legal issues in the future.
Gather all the tools and materials you'll need for the installation. This typically includes a tape measure, drill, screws, a level, a saw (if you need to cut the mesh panel to size), and safety equipment such as gloves and safety glasses.
Step 2: Selecting the Right Mesh Panel
Choosing the appropriate mesh panel is essential for a successful installation. Consider the purpose of the mesh panel. If you're looking for privacy, a panel with a smaller mesh size may be more suitable. For ventilation and visibility, a larger mesh size could be a better option.
Our Modern Double Hook mesh panels are a popular choice for decks. They are not only durable but also feature a modern design that can complement any deck style. The double - hook design provides a secure and stable installation.
Another option is our Gridwall Hooks mesh panels. These panels are easy to install and offer excellent flexibility. They can be adjusted to fit different deck configurations and are ideal for both small and large decks.
Step 3: Marking the Installation Points
Once you've selected the mesh panel, it's time to mark the installation points on your deck. Use a tape measure and a pencil to mark the locations where the panel will be attached. Make sure the marks are level and evenly spaced. If you're installing multiple panels, ensure that the spacing between the panels is consistent.
For a more accurate installation, use a level to check the horizontal and vertical alignment of the marks. This will help ensure that the mesh panel is installed straight and looks professional.
Step 4: Cutting the Mesh Panel (if necessary)
If your deck has an irregular shape or if the pre - cut mesh panel doesn't fit perfectly, you may need to cut the panel to size. Use a saw appropriate for the type of mesh panel you're using. For example, if you're using a steel wire panel, a hacksaw or a power saw with a metal - cutting blade can be used.
When cutting the panel, wear safety glasses and gloves to protect yourself from sharp edges. Measure twice and cut once to ensure that you get the correct size. After cutting, use a file to smooth any rough edges to prevent injuries.


Step 5: Attaching the Mesh Panel
Now it's time to attach the mesh panel to the deck. Start by aligning the panel with the marked installation points. Use a drill to create pilot holes in the deck at the marked locations. This will prevent the wood from splitting when you insert the screws.
Insert the screws through the mesh panel and into the pilot holes in the deck. Make sure the screws are tightened securely but not over - tightened, as this could damage the mesh panel or the deck.
If you're using a panel with a double - hook or gridwall hook design, follow the manufacturer's instructions for attaching the hooks to the deck. These hooks are designed to provide a quick and easy installation method.
Step 6: Securing the Edges
After attaching the main part of the mesh panel, it's important to secure the edges to prevent them from coming loose. You can use additional screws or clips to secure the edges of the panel to the deck. Make sure the edges are flush with the deck surface and that there are no gaps or loose parts.
Step 7: Finishing Touches
Once the mesh panel is installed, take a moment to inspect the installation. Check for any loose screws, uneven surfaces, or sharp edges. If you find any issues, make the necessary adjustments.
You can also add some finishing touches to enhance the appearance of the mesh panel. For example, you can paint the panel to match the color of your deck or add decorative elements such as plants or lights around the panel.
Maintenance Tips
To keep your mesh panel in good condition, regular maintenance is required. Clean the panel periodically using a mild detergent and water. This will remove dirt, debris, and any stains.
Inspect the panel regularly for any signs of damage, such as loose screws, bent wires, or rust. If you notice any issues, repair them promptly to prevent further damage.
Contact Us for Your Mesh Panel Needs
If you're interested in purchasing high - quality mesh panels for your deck or have any questions about the installation process, we're here to help. As a leading mesh panel supplier, we offer a wide range of products at competitive prices. Our team of experts can provide you with personalized advice and support to ensure that you make the right choice for your deck.
Don't hesitate to reach out to us for a consultation or to discuss your specific requirements. We look forward to working with you to transform your deck into a beautiful and functional outdoor space.
References
- General deck construction and installation guides from hardware stores.
- Manufacturer's instructions for mesh panels.
Send Inquiry