

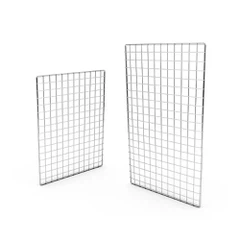
How to install a pegboard organizer on a brick wall?
Jul 03, 2025
Leave a message
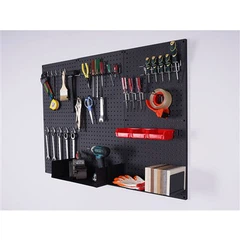
Hey there! I'm a supplier of pegboard organizers, and I know firsthand how useful these things can be. Whether you're looking to tidy up your garage, organize your retail store, or spruce up your workshop, a pegboard organizer on a brick wall can be a game - changer. In this blog, I'll walk you through the process of installing a pegboard organizer on a brick wall.
What You'll Need
First things first, let's talk about the tools and materials you'll need. You're going to need a few basic tools that you probably already have lying around the house. A tape measure is essential for getting the right dimensions. You'll also need a level to make sure your pegboard hangs straight. A drill with masonry bits is a must - have for drilling into the brick. And don't forget a pencil for marking where you'll drill.
As for materials, you'll need the pegboard itself. Make sure to choose a size that fits your space. You'll also need wall anchors suitable for brick, screws to attach the pegboard to the wall, and some Retail Peg Hooks or other pegboard accessories to hang your stuff. You can find a great selection of Pegboard Hooks with Price Tag and Scanner Peg Hooks on our website.
Measuring and Planning
Before you start drilling, take some time to measure the area where you want to install the pegboard. Use your tape measure to find the width and height of the space. Mark the center point of the area both horizontally and vertically. This will help you position the pegboard evenly.
Think about what you want to hang on the pegboard. If it's for a retail store, you might want to leave some space for signage or price tags. If it's for a garage, you'll need to make sure there's enough room for your tools. Sketch out a rough plan of how you want to arrange your hooks and other accessories on the pegboard. This will give you a clear idea of how the finished organizer will look.
Preparing the Brick Wall
Now it's time to prep the brick wall. Start by cleaning the area where you'll be installing the pegboard. Use a brush to remove any dirt, dust, or debris. This will ensure a good bond between the wall and the pegboard.
Next, use your pencil to mark the locations where you'll drill the holes for the wall anchors. If your pegboard has pre - marked holes, align them with the wall and mark the corresponding spots on the brick. If not, mark the holes about every 12 inches along the edges and in the corners of the pegboard.
Drilling into the Brick
Put on your safety glasses and grab your drill with a masonry bit. The bit should be the same size as the wall anchors you're using. Start drilling at a slow speed to avoid cracking the brick. Apply gentle pressure and let the drill do the work. As you drill, you might need to stop and clear out the dust from the hole. You can use a brush or a vacuum to do this.
Drill the holes to a depth that's slightly deeper than the length of the wall anchors. This will give the anchors enough room to expand and hold the pegboard securely. Once you've drilled all the holes, blow out any remaining dust with compressed air or a can of compressed air from the hardware store.
Installing the Wall Anchors
Insert the wall anchors into the drilled holes. Use a hammer to gently tap them in until they're flush with the wall. Make sure the anchors are seated firmly in the holes. If an anchor doesn't fit properly, you might need to drill the hole a little deeper or widen it slightly with a larger bit.


Attaching the Pegboard
Lift the pegboard up to the wall and align it with the wall anchors. Insert the screws through the holes in the pegboard and into the wall anchors. Use a screwdriver or a drill with a screwdriver bit to tighten the screws. Start with the corner screws and then work your way around the edges. Make sure the pegboard is level as you tighten the screws. If it's not, adjust it by loosening or tightening the screws slightly.
Adding the Accessories
Once the pegboard is securely attached to the wall, it's time to add the accessories. Start by inserting your hooks into the holes in the pegboard. You can choose from a variety of hooks, such as Retail Peg Hooks, Pegboard Hooks with Price Tag, and Scanner Peg Hooks. Arrange the hooks according to your plan.
If you're using other accessories like baskets or shelves, attach them to the pegboard using the appropriate hardware. Make sure everything is securely fastened and won't fall off.
Testing the Organizer
After you've added all the accessories, test the pegboard organizer. Hang some of your items on the hooks and see how it holds up. Check if the hooks are sturdy enough to support the weight of your stuff. If you notice any issues, such as a hook coming loose or the pegboard sagging, make the necessary adjustments.
Maintenance and Tips
To keep your pegboard organizer in good condition, regularly check the screws and wall anchors to make sure they're tight. If you need to move or rearrange your hooks, it's easy to do. Just remove the hook from the pegboard and re - insert it in a different location.
If you want to change the look of your organizer, you can paint the pegboard or add some decorative elements. You can also use pegboard dividers to create separate sections for different items.
Contact Us for Purchasing
If you're interested in purchasing pegboard organizers, hooks, or other accessories, we're here to help. We offer a wide range of high - quality products at competitive prices. Whether you're a small business owner looking to organize your store or a DIY enthusiast sprucing up your garage, we've got what you need. Reach out to us for more information and to start a purchase negotiation.
References
- Home Depot. (n.d.). How to Install a Pegboard. Retrieved from Home Depot website.
- Lowe's. (n.d.). Pegboard Installation Guide. Retrieved from Lowe's website.
Send Inquiry