

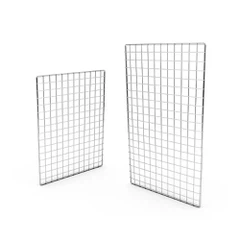
How to install welded wire panels?
Jan 09, 2026
Leave a message
Installing welded wire panels is a practical and useful skill, whether for a DIY project or a professional installation. As a supplier of high - quality welded wire panels, I'm here to guide you through the process step by step.
Pre - installation Preparations
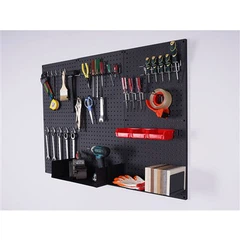
Before you start the installation, several preparatory steps are essential. First of all, measure the area where you plan to install the welded wire panels accurately. This measurement will help you determine the number and size of panels required. For instance, if you're enclosing a garden, measure the length and width of the perimeter. If it's for an interior display purpose, measure the dimensions of the wall or the space where the panel will be placed.
Next, gather all the necessary tools. You will typically need a tape measure (which you've already used for measurement), a level, gloves for safety, a drill, appropriate screws or fasteners, and a pair of wire cutters. The type of screws or fasteners depends on the surface where you're installing the panels. For wooden surfaces, wood screws are a good choice. For concrete or masonry, you may need concrete anchors or masonry nails.


Also, check the quality of the welded wire panels. Inspect the panels for any signs of damage during transit or storage. Look for loose wires, bent sections, or any welding defects. If you find any issues, contact your supplier (like us) immediately to get a replacement.
Installation on a Wooden Surface
Installing welded wire panels on a wooden surface is relatively straightforward. Start by marking the positions on the wood where the panels will be attached. Use the level to ensure the markings are straight and even. This step is crucial as it will make the final installation look neat and professional.
Once the markings are in place, place the welded wire panel against the wood at the marked position. Then, using the drill, make pilot holes through the panel and into the wood. These pilot holes prevent the wood from splitting when you insert the screws.
After making the pilot holes, insert the screws through the holes in the panel and into the wood. Tighten the screws firmly, but be careful not to over - tighten and damage the panel. Work your way around the perimeter of the panel, securing it evenly at regular intervals. If you're installing multiple panels side by side, ensure that the joints are aligned properly before screwing them down.
Installation on a Concrete or Masonry Surface
Installing on a concrete or masonry surface is a bit more challenging but still manageable. Begin by using a masonry drill bit to create holes in the concrete or masonry at the marked positions. The depth and size of the holes depend on the type of anchors you're using. Make sure to follow the manufacturer's instructions for the anchors.
Once the holes are drilled, insert the expanding anchors into the holes. Then, place the welded wire panel against the wall and align it with the anchors. Use a wrench to tighten the screws or bolts onto the anchors, securing the panel firmly to the surface.
For larger installations, it may be necessary to use a helper to hold the panel in place while you drill and secure it. This ensures that the panel remains stable and in the correct position during the installation process.
Installation for Display Purposes
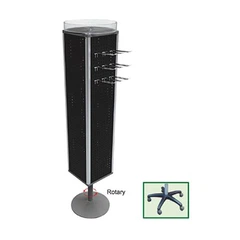
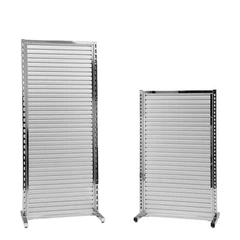
If you're installing welded wire panels for display purposes, such as creating a Basketball Display Ring or using Gridwall Display Hooks and Scanning Hook, additional considerations come into play.
First, when choosing the location for the display, consider factors such as visibility, lighting, and traffic flow. You want to ensure that the display is easily accessible and noticeable to your target audience.
Once you've selected the location, install the welded wire panels as described above, depending on the surface (wood or concrete). After the panels are installed, you can attach the specific display accessories like hooks. For gridwall display hooks, there are usually pre - drilled holes in the panels that are designed to fit these hooks. Simply insert the hooks into the holes at the desired positions to hang your products.
If you're creating a basketball display ring, you may need to use additional brackets or supports to ensure the stability and proper shape of the ring. Measure and cut the welded wire panels to the appropriate size and shape for the ring, and then attach the panels to the brackets and secure them together.
Post - installation Checks
After the installation is complete, conduct a thorough post - installation check. First, use the level again to ensure that the panels are still straight and level. If any adjustments are needed, loosen the screws slightly, make the necessary corrections, and then tighten the screws again.
Inspect the connections between the panels and the surface. Check for any loose screws or fasteners and tighten them if necessary. Also, check for any sharp edges on the panels that could pose a safety hazard. Use the wire cutters to trim any protruding wires and file down any rough edges.
Finally, test the functionality of the installation. If it's a display, hang some sample products to see if the hooks and the overall structure can support the weight. If it's an enclosure, check for any gaps or weak spots where the panels may not be fully secured.
Contact Us for Purchasing
If you're in need of high - quality welded wire panels for your projects, whether it's a simple home improvement task or a large - scale commercial installation, we are here to assist you. We offer a wide range of welded wire panels in different sizes, mesh configurations, and materials to meet your specific requirements.
Our team of experts can provide you with detailed product information, help you choose the right panels for your needs, and offer valuable advice on installation. If you have any questions about our products, installation processes, or need a quote, don't hesitate to reach out to us. Contact us today to start your next project with confidence.
References
- "Construction Handbook: Welded Wire Products", Construction Press, 20XX.
- "DIY Guide to Metal Mesh Installations", Home Improvement Magazine, 20XX.
Send Inquiry