

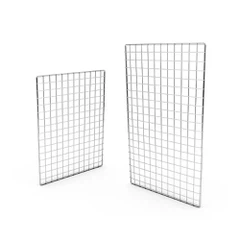
How to measure for a Wall Channel?
Jun 10, 2025
Leave a message
Measuring for a wall channel is a crucial step in ensuring a successful installation that meets your storage and organizational needs. As a trusted Wall Channel supplier, I understand the importance of accurate measurements. In this blog, I'll guide you through the process of measuring for a wall channel, providing you with the knowledge and tips you need to make informed decisions.
Why Accurate Measurements Matter
Before delving into the measurement process, it's essential to understand why accurate measurements are so important. A wall channel serves as the foundation for various storage solutions, such as shelves and hanging rails. If the measurements are incorrect, the wall channel may not fit properly, leading to instability, poor functionality, and an unappealing appearance. Additionally, inaccurate measurements can result in wasted materials and increased costs. By taking the time to measure correctly, you can ensure a seamless installation and a long-lasting storage solution.
Tools You'll Need
To measure for a wall channel, you'll need a few basic tools:
- Tape measure: A reliable tape measure is essential for accurate measurements. Make sure it's long enough to measure the entire length and height of the wall where you plan to install the wall channel.
- Level: A level will help you ensure that the wall channel is installed straight and level. This is crucial for the stability and functionality of the storage system.
- Pencil: You'll need a pencil to mark the measurements on the wall.
Step 1: Determine the Location
The first step in measuring for a wall channel is to determine the location where you want to install it. Consider the following factors when choosing the location:
- Accessibility: Choose a location that is easily accessible and convenient for your storage needs.
- Wall type: The type of wall you're installing the wall channel on will affect the installation process. Make sure the wall is strong enough to support the weight of the wall channel and the items you'll be storing on it.
- Clearance: Ensure that there is enough clearance around the wall channel for the shelves or hanging rails you plan to install.
Once you've determined the location, use a pencil to mark the top and bottom of the wall channel on the wall.
Step 2: Measure the Length
The next step is to measure the length of the wall channel. Use a tape measure to measure the distance between the two marks you made on the wall. Make sure to measure from the inside edge of the marks to ensure an accurate measurement.
If you're installing multiple wall channels, measure each one separately to ensure that they are all the same length.
Step 3: Measure the Height
After measuring the length, it's time to measure the height of the wall channel. Use a tape measure to measure the distance from the floor to the top mark on the wall. This will give you the height of the wall channel.
If you're installing the wall channel at a specific height, make sure to measure from the floor to the desired height and mark it on the wall.
Step 4: Check for Level
Before installing the wall channel, it's important to check for level. Use a level to ensure that the marks you made on the wall are straight and level. If the marks are not level, adjust them until they are.
Step 5: Consider Additional Accessories
In addition to the wall channel, you may need to purchase additional accessories, such as Steel Tube Spacers or Iron Shelf Supports. These accessories can help you customize the storage system to meet your specific needs.
When measuring for these accessories, make sure to follow the manufacturer's instructions. Some accessories may require additional measurements or adjustments.
Step 6: Double-Check the Measurements
Once you've completed all the measurements, it's important to double-check them to ensure accuracy. Measure the length and height of the wall channel again to make sure they are the same as the first measurements.
If you're installing multiple wall channels, make sure to double-check the measurements for each one.
Step 7: Order the Wall Channel
After double-checking the measurements, it's time to order the wall channel. As a Wall Channel supplier, I offer a wide range of wall channels in different sizes and styles to meet your needs. You can find our selection of Wall Channel on our website.
When ordering the wall channel, make sure to provide the accurate measurements to ensure that you receive the correct size.
Step 8: Installation
Once you've received the wall channel, it's time to install it. Follow the manufacturer's instructions carefully to ensure a proper installation. Make sure to use the appropriate tools and hardware for the installation.
If you're not comfortable installing the wall channel yourself, consider hiring a professional installer.
Conclusion
Measuring for a wall channel is a crucial step in ensuring a successful installation. By following the steps outlined in this blog, you can ensure that you measure accurately and choose the right wall channel for your storage needs.


If you have any questions or need further assistance, please don't hesitate to contact us. We're here to help you find the perfect Wall Channel solution for your home or business.
References
- "How to Install a Wall Channel." Home Depot.
- "Measuring for a Wall Channel." Lowe's.
Send Inquiry