

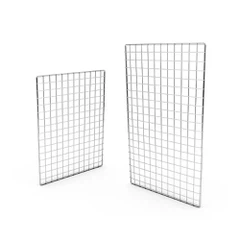
What is the best way to assemble a slat wall for display?
Nov 24, 2025
Leave a message
A slat wall is an incredibly versatile and practical solution for display purposes, whether in a retail store, a trade show booth, or a home garage. It provides a customizable and efficient way to showcase products, tools, or collectibles. As a supplier of slat walls for display, I've had the opportunity to work with various clients and understand the best practices for assembling these walls. In this blog, I'll share the best way to assemble a slat wall for display, from preparation to the final touches.
Preparation
Before you start assembling your slat wall, it's essential to gather all the necessary tools and materials. Here's a list of what you'll need:
- Slat Wall Panels: Choose high-quality panels that are suitable for your display needs. Consider the size, color, and material of the panels.
- Fasteners: Depending on the type of wall you're attaching the slat wall to, you'll need appropriate fasteners such as screws, nails, or adhesive.
- Tools: A drill, screwdriver, level, measuring tape, and a saw (if you need to cut the panels) are essential tools for the assembly process.
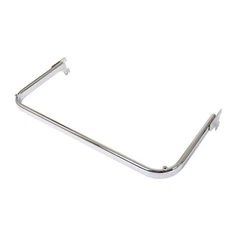
- Accessories: Slat wall accessories such as Slatwall Hooks with Price Tag Tabs, Slatwall Clothing Display Bar, and Slatted Metal Brackets for Glass Shelves can enhance the functionality and aesthetics of your display.
Measuring and Planning
The first step in assembling a slat wall is to measure the area where you want to install it. Use a measuring tape to determine the height and width of the wall. Make sure to account for any obstacles such as electrical outlets, switches, or windows.
Once you have the measurements, plan the layout of your slat wall. Decide how many panels you'll need and where you want to place them. Consider the height and spacing of the slats to ensure that your display items will fit properly. You can use a pencil to mark the positions of the panels on the wall.


Installing the Panels
- Prepare the Wall: If you're attaching the slat wall to a drywall, make sure to locate the studs using a stud finder. Mark the positions of the studs on the wall. If you're attaching the slat wall to a concrete or brick wall, you'll need to use masonry fasteners.
- Cut the Panels (if necessary): If the slat wall panels are too large for your space, you'll need to cut them to size. Use a saw to make straight cuts along the marked lines. Make sure to wear safety goggles and a dust mask when cutting the panels.
- Attach the Panels: Start by attaching the first panel to the wall. Align the panel with the marked positions and use a level to ensure that it's straight. Secure the panel to the wall using the appropriate fasteners. If you're attaching the panel to a stud, use screws or nails. If you're attaching the panel to a non-stud area, use adhesive or toggle bolts.
- Continue Installing the Panels: Once the first panel is installed, attach the remaining panels one by one. Make sure to align the panels properly and leave a small gap between them to allow for expansion. Use a level to ensure that each panel is straight.
- Trim the Panels (if necessary): If the slat wall panels extend beyond the edges of the wall, you'll need to trim them to size. Use a saw to make straight cuts along the marked lines.
Adding Accessories
After the slat wall panels are installed, it's time to add the accessories. Slat wall accessories can help you create a customized and functional display. Here are some tips for adding accessories:
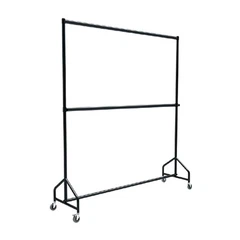
- Choose the Right Accessories: Select accessories that are compatible with your slat wall panels and suitable for your display items. For example, if you're displaying clothing, you'll need Slatwall Clothing Display Bar. If you're displaying small items, you'll need Slatwall Hooks with Price Tag Tabs.
- Plan the Placement of the Accessories: Before you start adding the accessories, plan the placement of each item. Consider the height and spacing of the slats to ensure that your display items will fit properly. You can use a pencil to mark the positions of the accessories on the slat wall.
- Install the Accessories: Once you have the placement of the accessories planned, start installing them one by one. Most slat wall accessories can be easily installed by inserting them into the slats. Make sure to secure the accessories tightly to prevent them from falling off.
Final Touches
After the slat wall and accessories are installed, it's time to add the final touches. Here are some tips for making your display look its best:
- Clean the Slat Wall: Use a clean, dry cloth to wipe down the slat wall panels and accessories. This will remove any dust or debris and make your display look clean and professional.
- Arrange the Display Items: Once the slat wall is clean, it's time to arrange the display items. Consider the color, size, and shape of the items to create an aesthetically pleasing display. You can use different types of accessories to create a variety of display options.
- Test the Display: Before you finalize the display, test it to make sure that all the items are securely attached and that the display is stable. You can try moving the items around to see how they look from different angles.
Conclusion
Assembling a slat wall for display is a relatively straightforward process that can be completed in a few hours. By following these steps and using the right tools and materials, you can create a customized and functional display that will enhance the visibility and appeal of your products. As a supplier of slat walls for display, I'm committed to providing high-quality products and excellent customer service. If you have any questions or need assistance with your slat wall installation, please don't hesitate to contact me. I'm here to help you create the perfect display for your needs.
References
- "Slat Wall Installation Guide." Home Depot.
- "How to Install a Slat Wall." Lowe's.
- "Slat Wall Accessories: A Guide to Choosing the Right Ones." Retail Display Systems.
Send Inquiry