

What is the installation process for a mesh panel fence?
Jan 06, 2026
Leave a message
Hey there! As a mesh panel supplier, I get a ton of questions about the installation process for mesh panel fences. So, I thought I'd share the ins and outs with you in this blog post. Whether you're looking to secure your property, mark a boundary, or add some style to your outdoor space, a mesh panel fence can be a great choice. Let's dive right into it!
Planning Your Fence
First things first, you need to plan your fence. This involves a few key steps:
Measure Your Area
Grab a measuring tape and measure the length where you want to install the fence. Make sure to measure accurately, taking into account any curves or angles. This will help you figure out how many mesh panels and posts you'll need.
Check Local Regulations
Before you start digging, check with your local authorities about any regulations or permits needed for fence installation. Some areas have rules regarding fence height, placement, and materials. You don't want to get slapped with a fine or have to take down your fence later!
Choose Your Mesh Panels
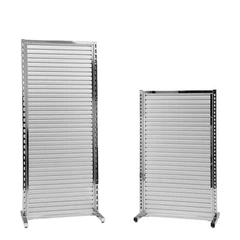
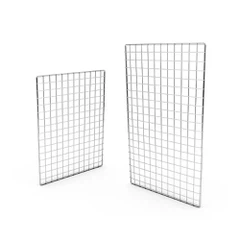
There are different types of mesh panels available, each with its own features and uses. For example, Steel Wire Panels are strong and durable, making them great for security fences. Gridwall Mesh Stand can be a good option if you're looking for a more decorative look. And if you need a panel with a unique design, Modern Double Hook might be the way to go.
Gathering Your Tools and Materials
Once you've planned your fence, it's time to gather the tools and materials you'll need. Here's a basic list:


- Mesh panels: The number will depend on the length of your fence.
- Posts: You'll need one post for every panel, plus a few extra for corners and gates.
- Concrete: To secure the posts in the ground.
- Screws or clips: To attach the mesh panels to the posts.
- Shovel: For digging post holes.
- Level: To make sure your posts are straight.
- Hammer or drill: Depending on the type of fasteners you're using.
Installing the Posts
The posts are the foundation of your fence, so it's important to install them correctly. Here's how:
Mark the Post Locations
Use stakes and string to mark the locations where you'll be installing the posts. Make sure the spacing is consistent and that the posts are in a straight line.
Dig the Post Holes
Use a shovel to dig holes for the posts. The depth and diameter of the holes will depend on the size of your posts and the soil conditions. As a general rule, the holes should be at least one-third the length of the posts and about 8-12 inches in diameter.
Set the Posts in the Holes
Place the posts in the holes and use a level to make sure they're straight. Fill the holes with concrete, making sure to vibrate the concrete to remove any air bubbles. Let the concrete dry for at least 24 hours before proceeding.
Attaching the Mesh Panels
Once the posts are dry, it's time to attach the mesh panels. Here's how:
Position the Panels
Place the mesh panels between the posts, making sure they're evenly spaced. You may need to use a helper to hold the panels in place while you attach them.
Attach the Panels to the Posts
Use screws or clips to attach the mesh panels to the posts. Make sure the fasteners are tight and that the panels are secure. If you're using clips, you can simply snap them onto the posts and panels. If you're using screws, you'll need to drill holes in the posts and panels first.
Adding Gates (Optional)
If you want to add a gate to your fence, here are the steps:
Measure and Cut the Gate Opening
Use a measuring tape to determine the width and height of your gate opening. Cut the mesh panels to the appropriate size, leaving a little extra room for the hinges and latch.
Install the Gate Hinges
Attach the hinges to the gate and the posts using screws or bolts. Make sure the hinges are aligned and that the gate opens and closes smoothly.
Install the Gate Latch
Attach the latch to the gate and the post, making sure it's secure. Test the gate to make sure it locks properly.
Finishing Touches
Once you've installed the fence and gate, it's time to add some finishing touches:
Trim the Excess Mesh
Use wire cutters to trim any excess mesh from the edges of the panels. This will give your fence a clean, professional look.
Paint or Stain the Fence (Optional)
If you want to add some color or protection to your fence, you can paint or stain it. Make sure to choose a paint or stain that's suitable for outdoor use and that matches the style of your home.
Conclusion
And there you have it! That's the basic installation process for a mesh panel fence. It may seem like a lot of work, but with a little planning and the right tools, you can install a fence that will last for years. If you have any questions or need help choosing the right mesh panels for your project, don't hesitate to contact me. I'm here to help you every step of the way.
If you're interested in purchasing mesh panels for your next project, feel free to reach out to me for a quote. I offer high-quality mesh panels at competitive prices, and I'd be happy to discuss your options with you. Let's work together to create the perfect fence for your property!
References
- "Fence Installation Guide" - General tips and best practices for fence installation.
- "Mesh Panel Selection" - Information on different types of mesh panels and their uses.
Send Inquiry