

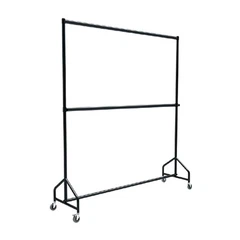
How to install a hang rail for clothes on a plaster wall?
Oct 17, 2025
Leave a message
Installing a hang rail for clothes on a plaster wall can be a practical and rewarding DIY project. As a supplier of high - quality hang rails for clothes, I've seen firsthand the benefits of having a well - installed rail. It not only keeps your clothes organized but also adds a touch of functionality to your space. In this blog, I'll guide you through the step - by - step process of installing a hang rail on a plaster wall.
Step 1: Gather Your Tools and Materials
Before you start the installation process, it's essential to gather all the necessary tools and materials. Here's a list of what you'll need:
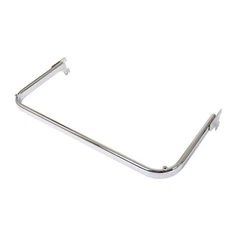
- Hang rail for clothes: Make sure to choose a rail that suits your needs and the amount of clothing you plan to hang. You can explore different options like Steel Wire Baskets, Perforated Metal Shelving, and Waterfall Faceout on our website.
- Measuring tape: This will help you accurately measure the length where you want to install the rail.
- Pencil: For marking the wall.
- Drill: A power drill with appropriate drill bits for plaster walls.
- Wall plugs: These are crucial for securing the rail to the plaster wall.
- Screwdriver: To insert the screws into the wall plugs.
- Level: To ensure that the rail is installed straight.
Step 2: Plan the Placement
The first step in the actual installation is to plan where you want to place the hang rail. Consider the following factors:
- Height: The standard height for a clothes hang rail is around 60 - 66 inches from the floor for a single - rod setup. If you're installing a double - rod system, the top rod should be around 80 inches from the floor, and the bottom rod around 40 inches from the floor. However, you can adjust these heights based on your specific needs, such as the height of the users and the types of clothes you'll be hanging.
- Length: Measure the available space on the wall and decide how long the rail needs to be. Make sure there's enough clearance on either side of the rail for easy access to your clothes.
- Stud location: While plaster walls may not always have studs in convenient locations, it's best to try and align the rail with wall studs if possible. You can use a stud finder to locate the studs. If you can't find studs at the desired location, don't worry; wall plugs will work just fine.
Once you've considered these factors, use your measuring tape and pencil to mark the position of the rail on the wall. Use the level to draw a straight line for the top of the rail.
Step 3: Drill the Holes
After marking the placement, it's time to drill the holes for the wall plugs. Follow these steps:
- If you've found a stud, drill holes directly into the stud using an appropriate drill bit. The size of the drill bit should match the size of the screws you'll be using.
- If there are no studs at the marked locations, drill holes into the plaster wall. Start with a small pilot hole to prevent the plaster from cracking. Then, use a slightly larger drill bit to create holes for the wall plugs. The depth of the holes should be slightly deeper than the length of the wall plugs.
- Be careful not to drill too deep or too hard, as this can damage the wall. Also, make sure to wear safety goggles to protect your eyes from any debris.
Step 4: Insert the Wall Plugs
Once the holes are drilled, insert the wall plugs into the holes. Use a hammer to gently tap the wall plugs into place until they are flush with the wall. Make sure the wall plugs are firmly seated in the holes, as this will ensure a secure installation of the rail.
Step 5: Attach the Rail Brackets
Now that the wall plugs are in place, it's time to attach the rail brackets. Place the brackets over the wall plugs and align the screw holes in the brackets with the wall plugs. Use a screwdriver to insert the screws into the wall plugs and tighten them securely. Make sure the brackets are level and firmly attached to the wall.


Step 6: Install the Rail
After the brackets are attached, it's time to install the rail. Place the rail into the brackets and slide it into position. Make sure the rail is securely seated in the brackets and that it's level. If the rail has end caps, attach them to the ends of the rail for a finished look.
Step 7: Test the Installation
Once the rail is installed, give it a gentle tug to make sure it's securely attached to the wall. Hang a few clothes on the rail to test its weight - bearing capacity. If the rail feels loose or wobbly, check the screws and wall plugs to make sure they are tightened properly.
Troubleshooting
- Cracking plaster: If you notice any cracking in the plaster while drilling, stop immediately. Fill the crack with a plaster repair compound and let it dry. Then, start the drilling process again, being more careful this time.
- Loose rail: If the rail is loose, check the screws and wall plugs. Tighten any loose screws or replace any damaged wall plugs.
- Uneven rail: If the rail is not level, use a screwdriver to adjust the brackets until the rail is straight.
Conclusion
Installing a hang rail for clothes on a plaster wall is a relatively straightforward process if you follow the steps outlined above. As a hang rail for clothes supplier, we're committed to providing you with high - quality products and the information you need to install them successfully. Whether you choose Steel Wire Baskets, Perforated Metal Shelving, or Waterfall Faceout, we're confident that you'll be satisfied with your purchase.
If you have any questions about our products or the installation process, or if you're interested in placing an order, please don't hesitate to contact us. We're here to assist you with all your hang rail needs.
References
- "Home Improvement Handbook" - A comprehensive guide to various DIY projects around the house.
- Manufacturer's instructions for the hang rail and wall plugs used in the installation.
Send Inquiry